
Pylon Sign Engineering and Installation: Footings, Wind Loads, Certification and What Happens on Site
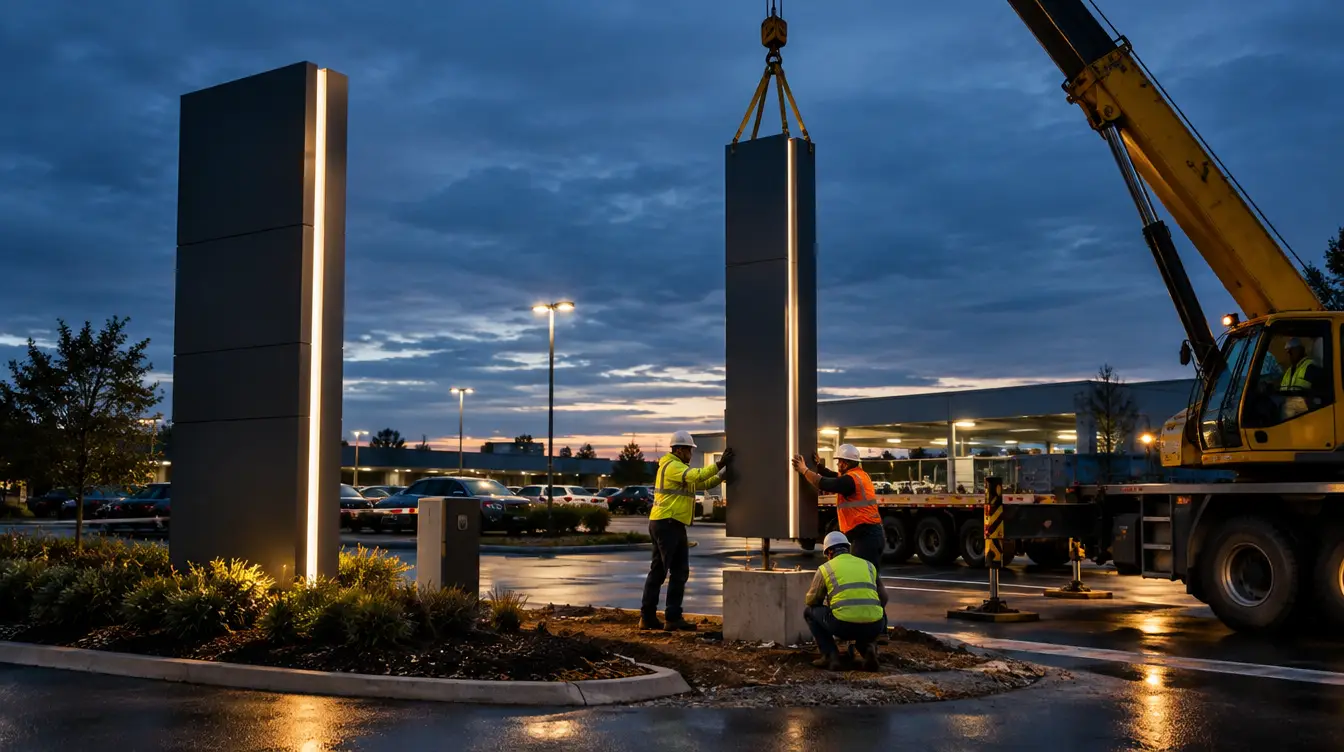
Pylon sign engineering and installation covers the structural design, footing, steelwork, certification and on-site build of a freestanding sign. In Queensland, a Registered Professional Engineer of Queensland (RPEQ) designs the structure for site wind loads under AS/NZS 1170.2, then crews excavate, pour footings, cure, lift the column and fix the sign faces.
A pylon sign looks simple from the road: a tall column with a sign on top. Structurally, it is a tall cantilever with a large flat face catching the wind, and it stands next to carparks, footpaths and driveways. That is why the work between design sign-off and a finished sign is mostly engineering, not signwriting.
This guide explains that middle stretch in plain English. It covers wind loading, footings, steelwork, certification and installation day, so you know why engineering adds cost and lead time, and what to expect when crews arrive. It focuses on structure only. Lighting, multi-tenant layouts and council approvals by location are separate topics.
Key Takeaways
- A pylon sign is a tall, wind-catching structure. Its size, height and location decide the engineering, not its artwork.
- AS/NZS 1170.2 sets how wind loads are calculated. Wind region, terrain category and site exposure drive column size and footing depth.
- Footings are designed to the ground, not to a standard drawing. Soil testing and underground service location come before any digging.
- In Queensland, an RPEQ designs the structure, and Form 15 and Form 16 certificates support building approval where it is required.
- Concrete must cure to the engineer's specified strength before the structure is loaded. Rushing the lift is a structural risk, not a scheduling win.
- Inspection does not end at handover. Fixings, corrosion and footings should be checked after severe weather.
Ready to make your business impossible to miss?
Design, manufacture and installation, all under one roof in Warana.
Get a Free QuoteSummary Table: From Sign-Off to Standing Sign
| Stage | What happens | Who is responsible | Why it matters |
|---|---|---|---|
| Wind and site assessment | Wind region, terrain and exposure are established | Engineer, with the sign company | Sets the loads the whole structure must resist |
| Ground investigation | Soil conditions checked, underground services located | Engineer, geotechnical firm, sign company | Footings are only as good as the ground they sit in |
| Structural design | Column, base and footing are designed and documented | RPEQ engineer | Produces the drawings and the engineer's signed design certificate |
| Fabrication | Steel is cut, welded and galvanised | Fabricator | Corrosion protection starts in the workshop |
| Footing construction | Excavation, reinforcement, bolts and pour | Installation crew, inspected by engineer | Hidden work that cannot be checked after the pour |
| Curing | Concrete reaches specified strength | Engineer sets the requirement | Protects the footing before it carries load |
| Lift and fix | Crane sets the column, faces are fixed | Licensed crane crew and installers | The visible build, done under safety controls |
| Power and handover | Licensed electrician connects supply, certificates issued | Electrician, sign company, engineer | Proves the sign is safe and compliant |
Why Do Pylon Signs Need Structural Engineering?
Pylon signs need structural engineering because they are tall, they carry large flat faces that act like sails in the wind, and failure puts people and property at risk. Engineering proves the column, base and footing can resist those forces for the life of the sign, and it gives the owner a documented basis for that claim.
Height and sail area multiply the forces
Wind pushes on the area of the sign face. The taller the structure, the further up that force acts, which increases the overturning effect at the base. Both the force and the lever arm grow as the sign gets bigger. That is why a modest increase in height or face size can demand a noticeably larger column and footing.
A solid double-sided face is the worst case for wind. An open frame with individual elements catches less. Engineers account for this through the solidity of the sign and the force coefficients in the wind standard, which is one reason the same design can behave very differently as a solid panel or as a perforated one.
Public safety and liability
Pylon signs usually sit where people gather: shopping centre carparks, service station forecourts, medical centres, club entrances. A sign that fails in a storm can hit vehicles, pedestrians and buildings. The owner of the land typically carries the liability, which is why property managers and centre managers should ask for the engineering documents before approving a build, not after.
Engineering also protects you in practical ways. Certified drawings help insurers, councils and building certifiers see that the structure was designed to a recognised standard. If something does go wrong later, a documented design and inspection trail matters.
Why engineering adds cost and lead time
Engineering adds cost because it adds real work: wind assessment, calculations, drawings, sometimes ground testing, engineer inspections on site, and certificates. It adds lead time because those steps happen in sequence. Footings cannot be designed until the ground is understood, and steel cannot be fabricated until the design is finished.
It also tends to add concrete and steel. A structure designed for the actual wind and soil at your site can be heavier below ground than the sign looks above it. That is normal. The alternative is an under-designed sign, and that cost shows up later.
How Does Wind Loading Shape a Pylon Sign Design?
Wind loading is calculated using AS/NZS 1170.2, the Australian and New Zealand standard for wind actions. The engineer combines your wind region, terrain category, local topography and the sign's size and shape to find the design wind pressure. That pressure drives column size, base connection and footing depth.
The inputs that matter
AS/NZS 1170.2 divides Australia into wind regions that reflect how severe storms and cyclones are likely to be. Queensland includes both non-cyclonic and cyclonic regions, so a site's location on the map changes the starting wind speed before anything else is considered.
From there, the engineer adjusts for the following.
- Terrain category. This describes what surrounds the site. Open country and open water give the wind a clear run. Suburban streets and dense development slow and disturb it. The standard defines a range of categories from very open to heavily built-up, and the choice affects the design wind speed at sign height.
- Topography. A sign on a ridge, escarpment or headland can see faster wind than one on flat ground. The standard includes a way to account for this.
- Shielding. Nearby buildings can reduce wind on a sign, but engineers are cautious about relying on it. A neighbouring building can be demolished or altered long after your sign is built.
- Sign geometry. Height above ground, face area, depth and how solid the face is all change the force that the wind applies.
- Importance and design life. The structure is designed to resist a wind event with a defined probability, and the importance of the structure influences that choice.
Exposed coastal sites versus sheltered inland sites
Consider two illustrative sites with identical sign faces. The first is a service station on an open coastal highway with flat, unobstructed land on the windward side. The second is a shopping centre sign sitting among large buildings and mature trees in an established inland suburb.
The coastal sign sits in a more open terrain category with a clear run for the wind. The engineer will usually specify a larger column section, a stronger base connection and a deeper or wider footing for it. The inland sign benefits from rougher terrain, which slows the wind near the ground, so the same face may need a lighter structure.
The coastal site also brings a second problem: salt-laden air. Wind load and corrosion exposure usually go together near the coast, so the same site often needs both a stronger structure and a tougher coating system. We cover that further down.
The point is not that coastal is expensive and inland is cheap. It is that the same sign cannot be priced from a catalogue. The site decides the structure, and anyone quoting without asking about your site is guessing.
What the engineer does with the wind pressure
Once the design pressure is known, the engineer finds the total force on the sign and the height at which it acts. That produces an overturning moment at the base. The column must resist the bending, the base connection must transfer it, and the footing must resist it through the ground. The same exercise is run for several wind directions and load combinations, including wind acting on the sign face and wind acting at an angle.
The result is a set of member sizes, bolt specifications and footing dimensions that you will see on the engineering drawings. If the sign design changes later, say a larger face or an added tenant panel, the calculations must be redone.
Which Footing Type Does a Pylon Sign Need?
Most pylon signs use either a pad footing or a bored pier footing. The right choice depends on the soil, the loads, the available space and nearby services. The engineer decides, based on the site conditions, because the footing must resist overturning and not just carry the sign's weight.
Pad versus bored pier
A pad footing is a wide, relatively shallow block of reinforced concrete. It resists overturning mainly through its own weight and the bearing pressure of the soil beneath it. It suits sites with good, stable ground near the surface and enough room to excavate a wide hole.
A bored pier footing is a drilled cylindrical shaft filled with reinforced concrete. It resists overturning through the friction and lateral pressure of the soil along its length. It has a small footprint at the surface, which helps where space is tight, such as beside a driveway, boundary or carpark. It also suits sites where the better soil is deeper down.
Neither is better in general. A pad can be cheaper to build where ground is good. A pier can be the only practical option where services and boundaries limit excavation.
When soil testing is needed
The engineer's footing design rests on assumptions about the soil. If those assumptions are weak, the footing can be wrong in either direction: wastefully large, or dangerously small.
A geotechnical investigation, normally guided by AS 1726, is more likely to be needed when any of the following apply.
- The site has fill, soft clay or reactive soils that move with moisture.
- Coastal sand or a high water table could affect pier stability and excavation.
- Rock is likely at shallow depth.
- The sign is large, tall or exposed, so footing loads are high.
- Existing site records show previous problems or unknown ground.
For smaller signs in well-understood areas, an engineer may rely on local knowledge and conservative assumptions instead. That is a judgement for the RPEQ, and it should be documented on the drawings. If conditions on the day do not match the assumption, work stops and the engineer is called.
Locating underground services
Before any excavation, the site must be checked for underground services. Before You Dig Australia (BYDA) is the free national referral service for this. You lodge an enquiry with the location and work details, and participating asset owners such as electricity, gas, water and telecommunications providers respond with plans of their assets.
Two cautions matter in practice.
- BYDA plans show approximate positions. They are a starting point. Where a footing is close to an asset, the location should be confirmed on site, for example by careful potholing.
- BYDA covers participating asset owners, not private services. Your own power feed to an old sign, irrigation lines, private stormwater, security cabling and data conduits may not be on any plan. On shopping centre and commercial sites, ask the property manager for as-constructed drawings, and consider a private service locator.
Hitting a live cable or gas main during a bore is a serious safety event. This step is cheap compared with the consequences of skipping it.
Concrete curing before loading
Concrete does not reach its design strength on the day it is poured. It gains strength over time, and conventionally it is specified by its compressive strength at 28 days. Curing conditions affect the result. Heat, wind and rain all matter, and Queensland summers can dry the surface of a pour quickly if it is not protected.
The engineer specifies the strength the footing must reach before it can carry the column and before the sign faces go on. Sometimes that is confirmed with test results, and sometimes with a minimum curing period set in the design. Either way, the crane lift is scheduled around curing, not the other way round.
This is one of the most common reasons a pylon sign project takes longer than owners expect. It is also the step you least want a contractor to shortcut. A footing that is loaded too early may not show any problem for months, until the first big storm.
What Is a Pylon Sign Made Of?
Most pylon signs use a fabricated steel column or frame, protected by galvanising and paint, and clad with aluminium, composite panel or similar face materials. Steel is chosen for strength and predictability. The connection to the footing and the corrosion protection are the details that decide whether it lasts.
Steel columns and fabrication standards
Columns are commonly fabricated from structural steel hollow sections or plate and designed to AS 4100, the steel structures standard. Fabrication and erection typically follow AS/NZS 5131, and welding is covered by AS/NZS 1554. You do not need to read these documents, but you should expect the engineering drawings to reference the relevant standards and the fabricator to work to them.
Base plate versus embedded designs
There are two main ways to connect the column to the footing.
Base plate with cast-in bolts. The column is welded to a steel plate and bolted to holding-down bolts cast into the footing. The column is lifted onto the bolts, levelled, tightened and grouted. This allows the column to be fabricated and coated off site. It also makes later replacement or repair of a damaged column more practical. The risk is in the bolts. Their positions must match the base plate exactly, so crews use a template and check positions before the pour. Bolts set in the wrong place are a classic site error and an expensive one.
Embedded column. The column is set into the footing and concrete is poured around it. It is simple and has no exposed bolts, which suits some designs. The weak point is the steel at the concrete-to-air line, where moisture and oxygen can combine to corrode it. Replacing an embedded column later usually means breaking out the footing.
Which is right depends on the loads, the site and the maintenance plan. For many commercial sites, an exposed and inspectable base plate connection is easier to look after over the life of the sign.
Corrosion protection near the coast
Salt air attacks unprotected steel quickly. For coastal and near-coastal sites, protection is part of the structural design, not a cosmetic finish.
- Hot-dip galvanising. AS/NZS 4680 covers galvanised coatings on fabricated steel articles. Hollow sections need vent and drain holes so the galvanising process is safe and the zinc coats the inside.
- Paint over galvanising. A duplex system adds a barrier layer. AS/NZS 2312 provides guidance on protecting structural steel in atmospheric conditions, and the right system depends on how corrosive the environment is.
- Detailing. Water should not be able to pond at the base or inside the column. Closed sections need to be sealed or drained properly. Grout and sealant at the base plate should shed water rather than trap it.
- Fasteners and dissimilar metals. Mixing aluminium cladding and steel without isolation can cause galvanic corrosion. Fixings should suit the environment and the metals they join.
A sheltered inland site can usually accept a lighter system. A site within reach of sea spray should not.
Cladding options
Cladding is the skin over the structure, and it affects wind load because it affects the sail area and weight.
- Aluminium composite panel is flat, light and widely used. It gives clean edges and takes printed or painted graphics well.
- Powder-coated aluminium sheet or fabricated aluminium suits custom shapes and holds up well outdoors.
- Acrylic or polycarbonate faces are common for illuminated signs, where the face needs to transmit light.
- Perforated or open designs reduce wind pressure, but they change the look and the structural solution.
Whatever is chosen, the engineer needs to know the face material and its weight before finalising the design. Swapping cladding late in the project is a common way to invalidate calculations without anyone noticing.
What Does RPEQ Certification Mean for a Pylon Sign?
RPEQ certification means a Registered Professional Engineer of Queensland has designed the structure and takes professional responsibility for it. In Queensland, professional engineering services must be provided by a registered engineer. For a pylon sign, that design is supported by Form 15 and Form 16 compliance certificates where building approval is required.
Why RPEQ matters
Registration in Queensland is administered by the Board of Professional Engineers of Queensland under the Professional Engineers Act 2002. An RPEQ has been assessed as competent in their field and is accountable for their work. Their registration can be checked on the Board's public register, and it is reasonable to ask for the engineer's name and registration number.
A general drawing or a catalogue detail from an interstate supplier does not replace this. Local engineers understand Queensland conditions, from cyclonic regions to reactive soils to coastal corrosion, and they carry local professional accountability.
Form 15 and Form 16 in plain terms
These are Queensland compliance certificates used in building work.
- Form 15 (design). A compliance certificate for building design or specification. The engineer certifies that the design complies with the relevant requirements. It is based on the engineering drawings and calculations.
- Form 16 (inspection). An inspection certificate. It confirms that building work, such as footings and reinforcement, was inspected and complies with the design. For footings, the key inspection happens before the pour, because concrete hides everything once it is placed.
Together they give the building certifier evidence that the sign was designed properly and built as designed. Without them, a certifier may not be able to approve the work.
Approvals still depend on your site
Not every sign needs the same approvals. Whether a pylon sign needs building approval, development approval under the local planning scheme, or both, depends on the council, the zoning, the sign's size and height, and its location relative to roads. Your building certifier or council will confirm what applies. Treat the engineering as one part of the approvals picture and ask early which documents the certifier will require.
What Happens on Installation Day?
Installation follows a fixed sequence: site preparation, excavation, reinforcement, concrete pour, curing, crane lift, fixing the faces and electrical connection. It rarely happens in one day. The footing stage and the lift stage are usually separated by the curing period.
Step 1: Site preparation and traffic or pedestrian management
Before anyone digs, the crew sets up the site. That includes a site-specific safety plan, confirmation of BYDA responses, barriers and signage, and an exclusion zone around the work. If the site is next to a public road or a busy carpark, traffic or pedestrian management is set up to keep vehicles and people away from machinery and the crane. Near a road, traffic control is planned to the Queensland Manual of Uniform Traffic Control Devices and usually involves trained traffic controllers.
On shopping centres, work is often scheduled around trading hours and delivery times. A good installer will agree those windows with the centre manager in advance.
Step 2: Excavation
A drill rig or excavator forms the pier hole or pad excavation. The crew checks the depth and the ground against the engineering assumptions. If they hit rock, groundwater, fill or unexpected services, work stops and the engineer is consulted. Spoil is removed or managed on site, and the hole is kept safe and secured.
Step 3: Reinforcement and holding-down bolts
The steel reinforcement cage is placed to the engineer's drawing, with correct cover so the steel is protected by concrete. Holding-down bolts are fixed in a template at the exact spacing, height and projection. This is when the engineer, or another competent person, typically inspects the work. That inspection supports the Form 16 certificate. Photos and measurements are taken because nothing can be checked after the pour.
Step 4: The pour
Concrete is delivered to the specified strength and placed in the excavation, then compacted so there are no voids. The crew checks that the bolts have not shifted and that the top of the footing is level and at the right height. After the pour, the surface is protected so it cures properly.
Step 5: Cure
The site then waits. The engineer's requirement for strength or curing time must be met before the structure is loaded. During this time, the footing area is kept safe and the bolts are protected from damage and water.
Step 6: Crane lift
The column and any pre-assembled frame are lifted by a crane operated by a licensed crane operator, with trained riggers guiding the load. The crew checks for overhead power lines, ground conditions under the crane and an exclusion zone for the lift. The column is lowered onto the bolts, levelled and plumbed, and the nuts are tightened to the specified procedure. The base is then grouted to fill the gap under the plate.
Step 7: Fixing the sign faces
The faces and cladding are attached to the frame. Depending on the design, this may happen on the ground before the lift, or at height from an elevated work platform after it. The fixings are checked for type, spacing and tightness, since they carry wind load from the face to the frame.
Step 8: Electrical connection
If the sign is illuminated, a licensed electrician connects power. In Queensland, electrical work must be done by a licensed electrician, and the installation should comply with AS/NZS 3000, the wiring rules. That includes safe isolation, protection devices, weatherproof enclosures and testing. Conduits are normally installed before the pour so they do not have to be cut through concrete later.
Step 9: Handover
At handover, the owner should receive the engineering documentation, certificates and any maintenance guidance. Keep them with the property's asset records. They are what you will need for insurance, future alterations and resale.
How Should You Inspect a Pylon Sign After Installation?
Inspect a pylon sign on a regular schedule and after every severe weather event. Check the fixings, the base connection, the steel for corrosion, the cladding and the ground around the footing. If you find movement, cracking or deep corrosion, restrict access and call an engineer.
The frequency of routine inspection should be set by the engineer or your asset management policy, based on the site and its exposure. Coastal sites warrant closer attention. After storms, cyclones or flooding, inspect as soon as it is safe.
A practical checklist looks like this.
- Fixings and bolts. Look for loose, missing or corroded bolts at the base plate and cladding. Loose fixings are an early warning sign.
- Base and grout. Check for cracks, gaps or staining around the base plate that suggest movement or water entry.
- Steel. Look for rust bleeding, flaking paint or white zinc corrosion, especially at welds, the base and any place water can sit.
- Cladding and faces. Check for warped, detached or vibrating panels, and for damaged sealant.
- Footing and ground. Look for cracks in the concrete, erosion, settlement or ponding around the footing. Any lean in the column should be treated as urgent.
- Electrical. Check enclosures and glands for water entry. Any electrical fault should be handled by a licensed electrician.
Take dated photos at each inspection. A record of the sign's condition over time is far more useful than a memory, and it supports insurance claims if damage occurs. Avoid pressure-washing the base, which can force water into joints.
What Most Pylon Sign Quotes Get Wrong
The most common mistake I see in pylon sign planning is treating engineering as a compliance task that happens after the design is approved. I think that sequence is backwards. The structure should be a design input from the first sketch, because column position, face area and height are not just visual decisions. They are structural ones.
Consider a hypothetical shopping centre manager who approves a tall, wide, solid face because it looks impressive in the render. The engineer then finds the column and footing needed are much larger than the budget allowed, and the design has to be cut back or the project re-priced. The sign face was never the problem. The order of decisions was.
The same applies to quotes. Two quotes for the same sign can differ widely because one includes a site-specific engineered design, inspection and certification, and the other assumes a standard footing. Ask every supplier four questions.
- Who is the RPEQ engineer, and what is their registration number?
- What wind region, terrain category and soil assumptions are the footings designed to?
- Will the engineer inspect the footings before the pour, and will Form 15 and Form 16 certificates be provided?
- Who manages the crane, the traffic control and the electrician?
If the answer to any of these is vague, you are not comparing like with like.
This is also why we run the build as one project at Sunquest Signs. Design, engineering coordination, approvals support, fabrication and installation sit under one point of accountability. You do not have to chase an engineer, a fabricator, a crane crew and an electrician separately, and the sign face is designed with the structure in mind from day one.
If you are planning a new or replacement pylon sign, book a site assessment and quote with Sunquest Signs. We will look at your site conditions, coordinate the engineering, support the approvals and manage the installation from start to finish.
References
- Standards Australia, AS/NZS 1170.2 Structural design actions, Part 2: Wind actions
- Before You Dig Australia, Free referral service for locating underground assets
- Board of Professional Engineers Queensland, Registration and public register of RPEQs
- Queensland Government, Professional Engineers Act 2002
- Safe Work Australia, Work health and safety guidance for construction
Talk to a signage expert
Tell us about your project and we'll come back with options and honest advice.
Get in TouchFrequently Asked Questions
Do pylon signs need engineering in Queensland?
Yes, in practice. A pylon sign is a tall structure exposed to wind, and it needs a structural design by a Registered Professional Engineer of Queensland. Whether building approval is also required depends on the sign's size, height, location and the local council or certifier, so confirm that early in the project.
How deep do pylon sign footings need to be?
There is no standard depth. Footing size depends on the wind load, the sign's height and face area, and the soil. An engineer calculates it for each site. Coastal, tall or large signs generally need larger footings than small signs on sheltered sites with good ground.
What are Form 15 and Form 16?
Form 15 is a Queensland compliance certificate for building design, in which the engineer certifies that the design meets requirements. Form 16 is an inspection certificate confirming that the work, such as footings and reinforcement, was inspected and complies. Certifiers use them to support building approval.
How long must concrete cure before the sign is lifted?
The engineer decides. Concrete is conventionally specified by its 28-day strength, but the engineer may set a different requirement based on test results or the design. The column should not be lifted until the footing has reached the specified strength.
Do I need to contact Before You Dig Australia before installing a pylon sign?
Yes, before any excavation. Before You Dig Australia is a free service that gets plans from participating asset owners. It does not cover private services, so also check site drawings and consider a private locator on commercial sites.
Related Articles
Pylon Signs in Toowoomba: Design, Wind Ratings, Council Approvals and Installation
Sunshine Coast Signage Project Gallery: Real Local Sign Installs by Suburb and Sign Type
Signage in Caboolture: Sign Options for CBD, Morayfield and Industrial Businesses, Council Rules and Costs
Signs that set you apart
Over 40 years on the Sunshine Coast. Design, compliance, manufacture and installation handled end to end.
Get a Free Quote